ATD Blog
Toolbox Tip: Use PowerPoint’s Selection Pane to Organize Objects on a Slide
Mon Jan 12 2015

Naming Objects on a Slide
When you insert an object on a slide, PowerPoint names it using the object type and a number (for example, Textbox 4). I rename objects on a slide when I have multiples of an object and I want to animate them.
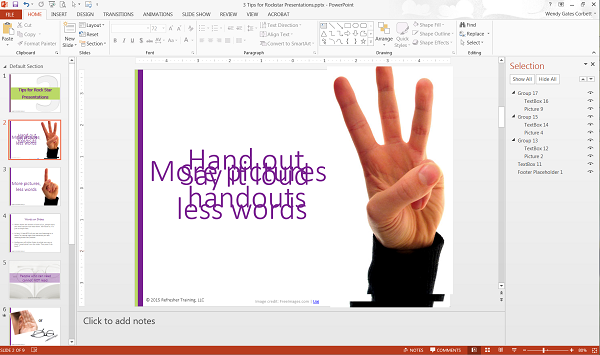
The slide below has three groups, one for each tip, but it’s hard to tell which group is Tip #1. Renaming the groups will make it easy to identify them.
Sign up for the Learning Technologies Newsletter!
One of my favorite PowerPoint discoveries is the Selection Pane. It’s a handy little tool to organize and manage the objects on a slide, such as images, shapes, and textboxes. I use it in two ways, mostly when working with slides that have multiple objects:
to de-clutter a slide by hiding some objects as I work with others
to name objects so they’re easy to identify.
Hiding Objects on a Slide
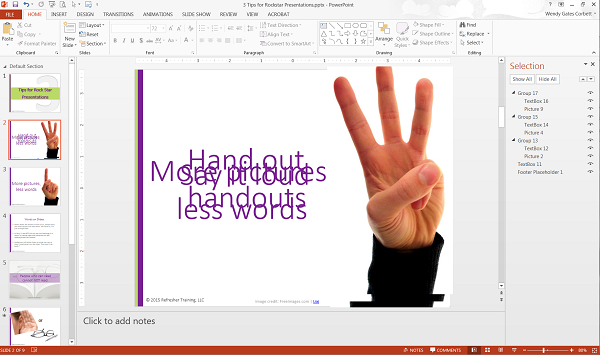
Hiding objects gets them out of the way without deleting them. I use the Selection Pane when I’m working on a slide with multiple objects or groups of objects and I want to work with them one at a time. For example, the slide below has three groups of objects: each group contains an image (1, 2, or 3 fingers) and a textbox. When they’re all showing, the slide is really messy.
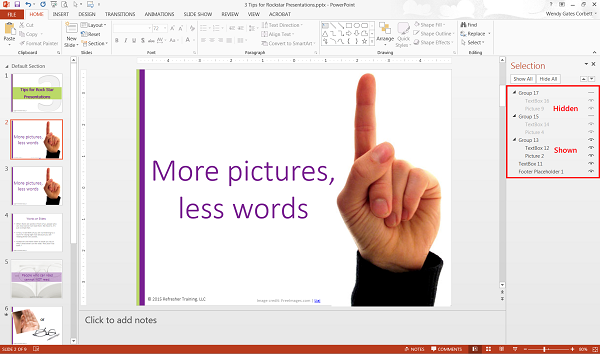
I followed these steps to hide two of the three groups so they don’t interfere as I work with the first group:
Show the Selection Pane.
On the Home tab in the Editing group, show the Select dropdown menu.
Choose Selection Pane.
The Selection Pane appears on the right side with a list of all objects on the slide.
In the Selection Pane, toggle the object’s visibility.
Select the object.
Click the “eye” icon to hide the object (see image below).
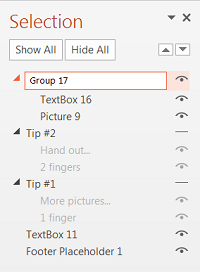
I followed these steps to rename the groups:
In the Selection Pane, click twice on an object name to make the field editable (note: this is NOT a double-click. Click slowly).
Edit the object name.
Click outside the name field. The new object name appears (see image below).
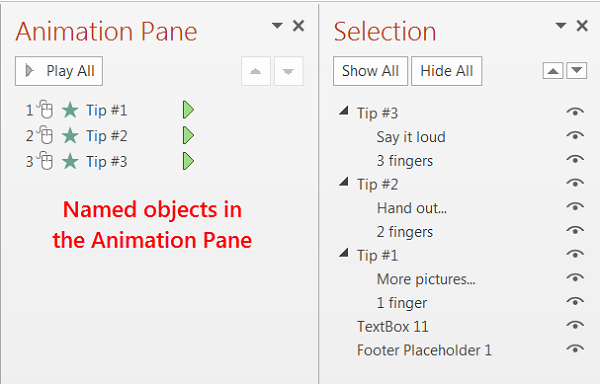
Here’s what renamed objects look like in the Animation Pane.
**
**
Tips for Working with the Selection Pane
Be sure to show all objects again when you’re done working on a slide. Objects that are hidden will not appear in Slide Show mode.
You don’t have to name every object on a slide. For example, I didn’t need to rename the slide footer or the textbox used for the image credits.
Check out similar articles: Escape PowerPoint Purgatory
More from ATD

