ATD Blog
Toolbox Tip: Custom Course Navigation
Tue Jan 27 2015

Bookmark
Articulate products have useful player and menu features built in, which makes developing e-learning a little easier. But sometimes your course needs something different from the standard option.
Does this complicate things? Fortunately, the answer is no.
Customizing the Course Player
There are several ways to customize the look and functionality of your course navigation, both globally and for individual slides. Using the course player, you can modify the appearance and function of the menu and the Previous and Next buttons (along with other elements that I won’t elaborate on in this post). Let’s go through each of these now.
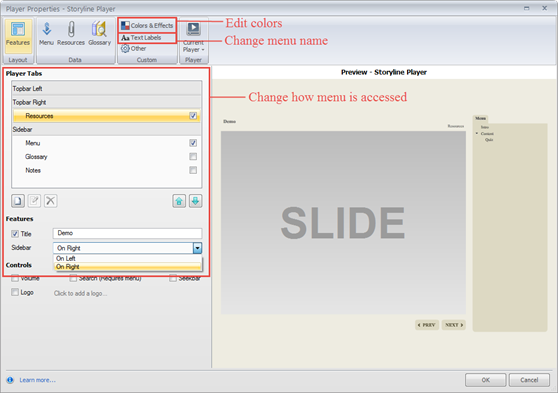
Menu. The menu can be used as a navigational tool, and you can give it a look and feel to match your project. For example, if you want to change how learners access the menu or tweak its colors or give it a different name, simply open the Player Properties editor and adjust the Player Tabs, Colors & Effects, or Text Labels as you see fit (see figure below).
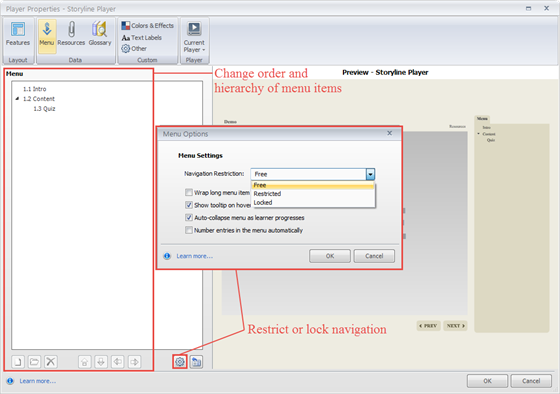
You can also change the order and hierarchy of items in the menu, as well as restrict or lock navigation (see figure below).
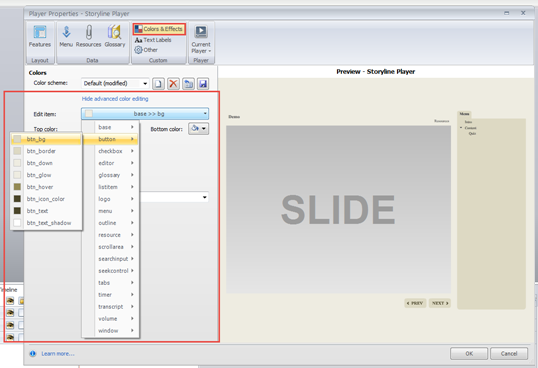
Previous and Next buttons. From the Player Properties editor, you can change the colors of every element in the player, including the Previous and Next buttons (see figure below).
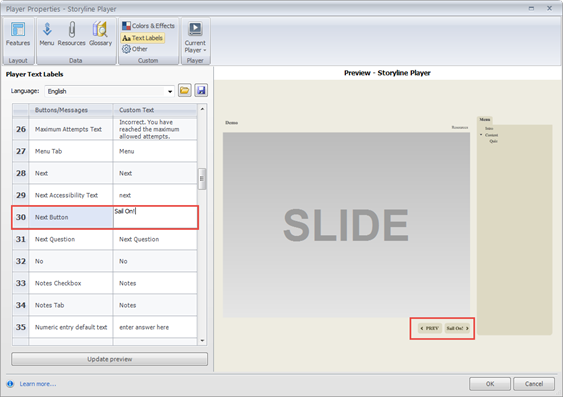
As with the menu, you can change the text on each of those buttons. If you want your Next button to say “Continue” or “Sail On,” you can do that (see figure below).
Customizing Navigation for Individual Slides
Let’s look at how you can change the navigation options for particular slides. For Storyline, you want to be in Story View. For Presenter, just click the Slide Properties button in the toolbar.
Within each of these, you can easily turn the Previous and Next buttons on or off for each slide (see figure below).
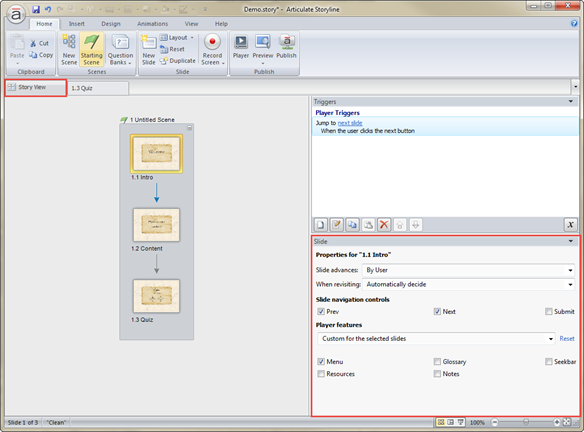
In addition, you can turn on or off other player features, such as the menu. This might come in handy in a course where learners could navigate from the menu but you want to stop them from navigating away from a quiz question.
Creating Your Own Navigation
Let’s say you want Previous and Next buttons that are circles, or in the shape of a tiny compass rose. With the information above, this is easy as pie. Here’s how (see figure below):
Turn off the Previous and Next buttons for all of your slides. In Storyline, you can do this for all slides in one fell swoop by selecting any scene or slide and pressing CTRL+A twice to select all slides. Then, use your Slide panel to deselect Previous and Next.
Create a custom button using any of Storyline’s built-in buttons, markers, or shapes, or an image you import into the project.
Create a trigger for your custom button that jumps to the next slide when clicked.
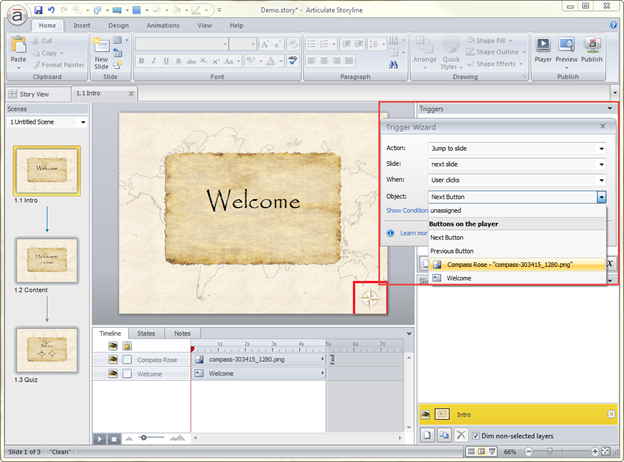
You can also create triggers that automatically advance when a slide ends, an activity is complete, or a user hovers over an object. With all of these options, you can really let your learners explore your e-learning world!
More from ATD
